How to use CAYIN MediaSign Player
User interface introduction
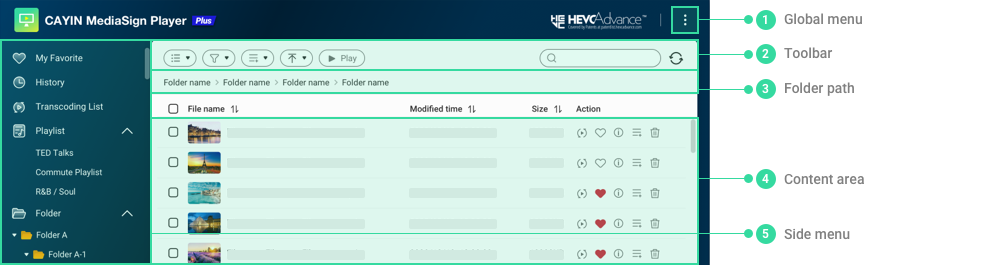
- Click the "..." icon; then, you can manage folders, set access control, and learn about the software version.
- A general toolbar to execute commands. You can click the Play button to start playing video files listing in the table or click the Refresh button to reload files in the current folder. Enter text in the search box
 to search the files with keywords. You can click
 to upload multimedia files to the current folder.
 - Display the current folder path.
- The supported multimedia files in the current folder.
- A directory tree for selected folders in this NAS. Based on the authorization of your account, you can view a tree of the current folder and all descending folders and files stored in the NAS device. There are four virtual folders:
- My Favorite: All videos which you mark as your favorite one will be listed in this folder.
- History: The list contains the 20 most recently played files.
- Transcoding List: This table will show all video files which are still in the transcoding process if you ever convert video files into different formats.
- Playlist: The lists you created and added files in the playlist.
Manage Folders
In addition to the Multimedia folder on the NAS, the App will also retrieve folder lists automatically from three Apps on QNAP NAS: VideoStation, PhotoStation and Qumagie. You can still follow the steps below to edit your own folder list.
- Click the "...
" icon on the right top of the program.
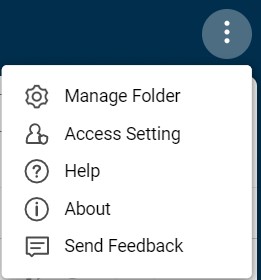
- Click Manage Folder; then you will see a pop-up window for you to edit folders.
- All folders on the NAS will be listed in the left-side pane. Check the folder you want; then, it will be shown in the right-side pane. If you want to remove a folder from the selected list, just uncheck the folder in the left-side pane. Please note that the sub folder will not be shown in the right-side pane if its parent folder is checked.
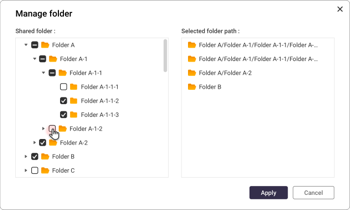
- Click the Apply button to make the new setting effective.
Switch between views
MediaSign Player supports three different views to let you choose a suitable one for your usage preferences. You can click on the toolbar to switch between the views.
- List view: Display video files in the folder. You can see most file information in this mode.
- Thumbnail view:Display video thumbnail preview only. You can click on the bigger preview icon to choose the video.
- Playback view: Video preview thumbnail on the bottom and playback window on the top. It's good for you to navigate the video contents.
Play video files
- Select a folder in the left pane. Then, you will see all video files in that folder showing in the table in the right pane. Files will be arranged in alphabetical order by name.
- Select video files which you want to play. If you only want to play some of those files, you can select a file by clicking any part of a row; then, the selected row will be marked green. To cancel the selection, just click the green row again. The system will open a new window to play video files after you click the Play button.
MediaSign Player can play MP4 files with codec H.264, AAC or MP3. Files with codecs not mentioned above will be simultaneously converted and played as streaming video (On-the-fly Transcoding). Please note that On-the-fly Transcoding only applies to those formats and codecs MediaSign Player supports. arm32 platform does not support On-the-fly Transcoding. In addition, the hardware performance and network bandwidth will affect the smoothness of streaming video.
- Decide the playback sequence. Initially, the media player plays video files in alphabetical order. You can still change the playback sequence by moving the file name up and down. Just click and drag it to the new position.
MediaSign Player can play the following file formats and audio/video codecs:
| Format : | MP4 |
|---|---|
| Video Codec : | H.264 |
| Audio Codec : | AAC/MP3 |
Commands to play video
You can use the following commands to enhance your playback experience in MediaSign Player.
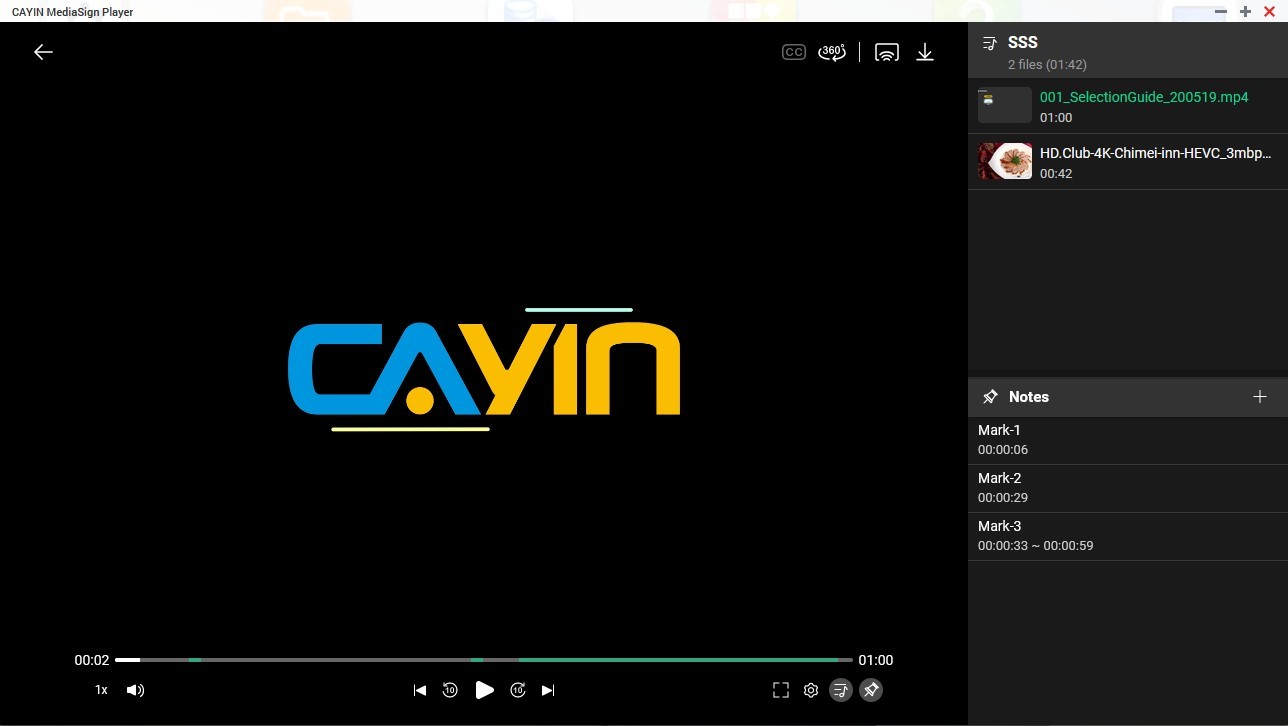
 Fullscreen: Play the video in fullscreen mode.
 Video setting: Configure the video option while playing.
 Playlist window: Open and close playlist window on the right.
 Notes: Open and close Notes window on the right. With Notes, you can add personal notes to your video. You can click a Note and jump to it easily or repeat the video with the Note.
 Subtitle: Turn on or off video subtitle (if available).
 360° effect: Turn on or off 360° effect (if availble).
 Network cast: Project the video to your network device which supports network cast function.
 Download: Download the video to your local drive.
Set my favorite videos
- Select a folder in the left pane. Then, you will see all video files in that folder showing in the table in the right pane.
- There's a Favorite icon in the table. Just click the heart shape icon to mark a video as a favorite.
- Every video file marked as a favorite will be added in the virtual folder, My Favorite. Click the folder in the left pane to show the complete list, sorted by time added to the folder. You still can change the playback sequence by moving the file name up and down after you click the Play button.
Convert video formats
- Select a folder in the left pane. Then, you will see all video files in that folder showing in the table in the right pane.
- There's a Action column in the table. Locate the file you want to convert format and click the transcoding icon in the same row. Then, the system will open a transcoding page.
- Complete the format, resolution and rotation settings. The transcoded new file will be stored in the @Transcode folder with a noneditable filename shown below. Then, click the Transcode button.
- Every video file in the transcoding process will be added in the virtual folder, Transcoding List. Click the folder in the left pane to check the complete list, showing the progress percentage of each file conversion.
- Please note that the transcoding process might take a few minutes or even hours depending on your file size and NAS hardware performance. If you want to terminate the process, just click the red rectangle icon at the end of the percentage bar.
MediaSign Player supports the following file formats and audio/video codecs:
| Format : | 3GP, ASF, AVI, M4V, MPEG, MP4, TS, WMV |
|---|---|
| Video Codec : | Basic version: AVC (H.264), MPEG-2, MPEG-4, VP8, VP9, WMV1, WMV2, VC-1 Plus version: AVC (H.264), MPEG-2, MPEG-4, VP8, VP9, WMV1, WMV2, VC-1, HEVC (H.265) |
| Audio Codec : | ADPCM, MP3, PCM, Vorbis, AAC |
Note: The following options are only available in MediaSign Player Plus version.
- Video/Audio options: You can adjust several Video/Audio parameters while transcoding, including bitrate, frame/sample rate, and audio codec.
- Screenshot
 : Capture and download the current frame as a JPEG file.
 - Add subtitle
 : Add subtitle to a video. You must save the SRT file in the same folder as your video file. The filename of the SRT file and your video file must be identical. For example, your video filename is ��my_video.mp4��; then your SRT file name must be ��my_video.srt��. The subtitle in SRT file will be added to the video after transcoding. The icon can be in 3 colors:
Green: the function is enabled.
Black: the function is disabled.
Grey: the function is not available in your version. - Add watermark
 : Add a watermark on top of your video. You can either enter a text sentence or choose an image file (JPG, PNG, BMP, or GIF format). Please note only PNG and GIF formats support transparent background.
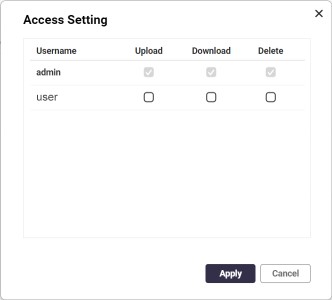
Access setting (plus version only)
Click the ... icon on the right top of the program. Choose Access Settings to configure access right to users. You can grant or remove each user from permissions to access Upload, Download, and Delete functions.
Actions
You can see several actions on the right hand side of each multimedia file.

- Transcoding: Convert/transcode video/audio files. Please refer to Convert video formats for details.
- Add/remove my favorite: Toggle the file as your favorite video.
- Information: View detailed information of the file.
- Add/remove from playlist: Add/remove files in the playlist.
- Delete file: Remove the file from your NAS.
Function comparison of Basic and Plus version.
Basic
Plus
Setting
Send Feedback
Video playback count
Access right management
View
List, thumbnail, and Playback view
Playlist
My Favorite
Transcoding list
History
Playlist
Video Player
360 degree,Download,Network cast,and subtitle
Playlist
Notes
Transcode
Basic video parameter
Advance video parameter
Basic audio parameter
Advance audio parameter
Video clipping
Screenshot
Watermark
Add subtitle
Transcoding recommendation for streaming video
To ensure the streaming video quality and smoothness, you should use the following transcoding parameters and a fast, high bandwidth network.
Suggested bit rate and resolution for streaming video:
| Resolution/fps: | Video bitrate |
|---|---|
| 4K/2160p @60 fps | 20,000 - 60,000 Kbps |
| 4K/2160p @30 fps | 10,000 - 35,000 Kbps |
| 1080p @60 fps | 4,000 - 10,000 Kbps |
| 1080p | 3,000 - 8,000 Kbps |
| 720p @60 fps | 2,500 - 6,000 Kbps |
| 720p | 1,500 - 4,000 Kbps |
| 480p | 1,000 - 2,000 Kbps |
| 360p | 1,000 - 2,000 Kbps |
| 240p | 1,000 - 2,000 Kbps |